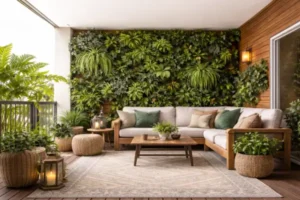
How to channel rainwater for vertical gardens in gourmet balconies is a common question for those looking to bring both practicality and functionality to their plant care routine. Even in small spaces, collecting rainwater in a gourmet balcony can be a smart and sustainable solution.
With a bit of planning and a few simple adjustments, you can set up a system that captures and directs rainwater straight to your vertical garden—helping your plants thrive with minimal daily effort.
In this guide, you’ll find everything you need to turn rainwater into a reliable ally for your gourmet balcony. From the right materials to a step-by-step installation, we’ll walk you through practical tips that truly work.
How to Channel Rainwater for Vertical Gardens in Gourmet Balconies: Where to Begin
How to channel rainwater for vertical gardens in gourmet balconies starts with a careful look at the space where everything will happen: your balcony. Even in compact areas, there’s plenty of potential to collect and guide the rainwater that flows in naturally.
The first step is to understand how water behaves in your space. On a rainy day, take a moment to observe:
- Where water tends to pool quickly
- The natural paths it follows as it flows
- If there are any dripping points from the roof or awning
- Whether the floor has a slope that channels water to a specific corner
These simple observations will help you pinpoint the ideal spot to install gutters, funnels, or collectors. That way, you set the stage for an efficient system right from the start.
Next, decide how you want to use the water you collect. There are two main approaches:
Direct use
This means rainwater is collected and sent straight to the vertical garden for immediate irrigation. It’s perfect if you’re looking for a low-maintenance option without the need for water storage.
Use with a reservoir
In this case, rainwater is stored for several hours or even days, to be used gradually depending on your plants’ needs. This setup requires a bit more structure but gives you greater control over when and how you water your garden.
Choosing between the two depends on factors like how often it rains in your area, how many plants you have, and how much time you’re able to dedicate to garden care.
Considering the Structure of Your Gourmet Balcony
Another key aspect is to assess the layout and structure of your gourmet balcony. Before installing anything, take note of the following:
- The space available for pipes, containers, or hoses
- The location of pots or vertical garden panels
- The distance between the water collection point and your plants
- Whether it’s possible to secure pipes or holders without drilling too much into the wall
- The overall aesthetics—you want the system to look good, too!
Planning everything calmly helps you avoid last-minute fixes, prevents leaks, and ensures your setup won’t interfere with the structure or style of your balcony.
Lastly, check if your building allows minor changes to the façade or outdoor areas. In many cases, it’s completely possible to install a discreet and functional system without altering the original structure.
With this initial overview, you’re already taking a big step toward building a system that’s simple, effective, and perfectly tailored to your space. And best of all, you’ll start seeing results right from the very first rains.
Understanding Rainwater Harvesting Systems
When thinking about how to channel rainwater for vertical gardens in gourmet balconies, one of the most important steps is understanding which rainwater collection systems are suitable for your space. The right choice depends on the size of your balcony, how much rain you typically get, and how automated you want the process to be.
Even in small spaces, there are effective ways to guide the rainwater that runs off your roof, awning, or even down the walls. The key is to choose simple solutions that are smartly designed.
Here are the main systems you can use—and how each one works in practice:
Gutters with Directional Flow
Gutters are the foundation of any rainwater harvesting system. They collect rainwater that runs off the roof or balcony cover and channel it to a designated collection point.
Benefits:
- Continuous collection throughout the entire rainfall
- Easy to connect with pipes or hoses
- Can be installed discreetly along the edges of walls
In balconies with glass or polycarbonate coverings, water often accumulates along the edges. Installing gutters in these areas prevents water from pooling on the floor and allows for more efficient redirection.
Compact Water Reservoirs
These are great for storing rainwater before using it on your plants. Whether you need to store it for a few hours or keep a small supply during dry spells, compact reservoirs offer flexible solutions.
Common options:
- Small water tanks (up to 50 gallons)
- Durable lidded buckets
- Plastic drums with a bottom spout
- Decorative planters adapted for storage
Advantages:
- Allow for controlled water use
- Can be tucked into corners without getting in the way
- Some models come with wheels for easy movement
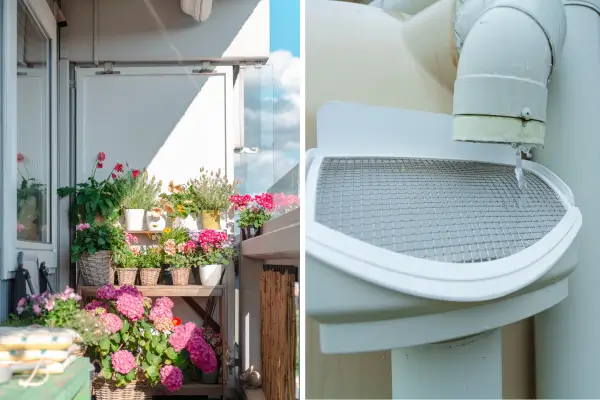
If you choose to store rainwater, be sure to keep it covered and use a mesh or filter at the intake to prevent debris and insects from getting in.
Leaf and Debris Filters
A small but powerful addition to your setup, filters make a huge difference in system efficiency. Since rainwater often carries leaves, twigs, and dirt, a good filter keeps your setup clean and running smoothly.
Most common types:
- Fine nylon or stainless-steel screens
- Sieve-style adapters at the reservoir intake
- Layered cylindrical filters fitted into the piping
Why use them:
- Prevent clogs in the pipes
- Keep your plants healthy by blocking debris
- Extend the overall lifespan of the system
Flexible Hoses and Tubing
These components are key to delivering water directly to your vertical garden. Depending on the elevation difference between the collection point and the planters, the flow can happen naturally—powered by gravity alone.
Advantages:
- Easy to install and adjust
- Allow water to be routed discreetly along balcony edges
- Work well with small faucets or drip irrigation systems
Usage Tips:
- Transparent level hose to monitor water flow
- Black tubing to block light and prevent algae growth
- Connectors and valves to direct water to different parts of the garden
Low-Pressure Pumps (Optional)
If your vertical garden is positioned higher than the collection point, you might need a small pump to help lift the water. These pumps are easy to find at aquarium or gardening stores.
When to Use a Pump:
- When the water reservoir sits on the floor and the garden is mounted high on the wall
- In vertical gardens with several rows that require more pressure to reach the top
- If you want to automate watering with a timer
Ideally, all these elements should work together as a single, integrated system tailored to your space. A practical setup for a gourmet balcony might look like this:
- A side gutter collects rainwater from the balcony cover
- A hose channels the water into a small, lidded reservoir
- A simple mesh filter blocks leaves at the entrance
- The outlet is fitted with a spigot connected to a perforated hose
- Water is distributed via drip irrigation to the vertical garden planters
This kind of setup makes how to channel rainwater for vertical gardens in gourmet balconies both practical and efficient.
Recommended Materials to Channel Rainwater
Building an efficient system starts with choosing the right materials. Once you understand how to channel rainwater for vertical gardens in gourmet balconies, you’ll see it doesn’t require anything complex. With simple and affordable items, you can create a setup that’s functional, durable, and easy to maintain.
Below are the main categories of materials and how each one contributes to your system.
Pipes and Connectors
These components guide water from the collection point to your vertical garden. Choosing the right type of pipe helps prevent leaks and makes installation smoother.
What you’ll need:
- PVC pipes between ½ inch and 1 inch, depending on your space and the volume of rainfall
- Elbows, joints, and couplers to shape the water’s path
- Tees and threaded adapters if you want to split the flow or add small faucets
Pro tip: Thinner pipes work well for light rain and small areas. For larger roofs or heavier rain, go with wider pipes to handle the flow efficiently.
Water Storage Containers
Not all rainwater has to be used right away. Having a designated place to store it gives you more flexibility in daily plant care.
Useful options for balconies:
- Lidded plastic buckets
- Small water tanks (13 to 50 gallons)
- Reusable containers with spouts or valves
- Decorative planters adapted for water storage
Important: Always keep your storage container covered to prevent debris or contamination.
Simple Filtration Systems
Before the water reaches your plants or the reservoir, it should pass through a filter. This keeps the system clean, prevents clogs, and protects your plants’ roots.
Recommended materials:
- Nylon or stainless-steel mesh screens installed at the pipe’s entrance
- Metal sieves that fit over buckets or tanks
- Adaptable filters like perforated discs or thick foam inserts
Helpful tip: Always filter at the entry point—never after the water is already stored.
Flow Control Components
Being able to easily start and stop the flow of water is essential—especially when using a storage reservoir. That’s why adding simple valves to your system makes a big difference.
Include these in your setup:
- Small plastic or metal spigots attached to the bucket outlet
- Pressure valves to control water going into the hose
- Quick connectors if you want to assemble and disassemble the system frequently
These pieces help you regulate how much water is used and prevent unnecessary waste.
Flexible Hoses and Tubing
Once your rainwater is ready to use, it needs to be delivered to the plant roots. Hoses are ideal for this task, especially in vertical garden setups.
Smart options at this stage:
- Transparent level hoses for easy monitoring
- Standard garden hoses, which are durable and long-lasting
- Perforated hoses to create a simple drip system
You can attach these hoses to the garden structure using clips and guide the flow straight to each planter.
Clamps and Support Accessories
Keeping everything securely in place ensures both safety and convenience. A few small accessories can help organize your system and maintain the clean look of your balcony.
Make sure to have:
- Zip ties (plastic cable ties)
- Pipe clips that mount to the wall with screws
- Moisture-resistant adhesive tape
- Hooks and brackets, in case you need to lift the hoses off the ground
These small additions play a big role in the long-term stability of your rainwater system.
Suggested Starter Kit to Begin Your Project
If you’re ready to start building a practical rainwater system right away, here’s a simple starter kit you can put together with ease:
- 3 feet (1 meter) of PVC pipe
- 2 elbow joints and 1 connector
- 1 lidded bucket
- 1 basic spigot
- 1 mesh filter
- 3 feet (1 meter) of clear level hose
- 4 mounting clips
With this setup, you can start collecting rainwater, storing it, and guiding it to your vertical garden—without complications.
Step-by-Step Installation Guide
Now that you’re familiar with the materials and basic concept, it’s time to put your system together. Setting up rainwater collection for your gourmet balcony might sound technical at first, but it’s actually quite simple when done with care and attention.
Here’s a step-by-step guide—perfect for beginners.
Step 1: Identify Where Rainwater Accumulates
Start by observing your balcony during a rainy day. Look for the spots where water naturally gathers or flows more heavily.
What to look for:
- Dripping points from the roof edge or awning
- Corners where water runs down the sides
- Areas where the floor stays constantly wet
Typically, the lowest point of the roof structure is the ideal place to position your gutter or water collector.
Step 2: Install the Gutter or Rain Collector
Once you’ve chosen your collection point, install a gutter, funnel, or collector. This piece will capture rainwater efficiently without letting it splash or go to waste.
Tips for this step:
- Secure the gutter firmly, with a slight downward slope to guide water
- If the water falls in a concentrated stream, use a wide-mouth funnel
- Avoid sharp changes in elevation that could cause backflow
Step 3: Direct the Water to the Reservoir
Now, connect the gutter or funnel outlet to the hose or pipe that will carry the water to your storage container. Make sure the path has a gentle slope so gravity can do the work.
What to use:
- PVC pipes tightly fitted with connectors
- Flexible hoses secured with clips
- Mounting brackets to keep the path stable and tidy
Important: Avoid sharp bends, as they can slow or block the water flow.
Install a Simple Filter Before the Reservoir
Before the water enters the bucket or tank, it needs to go through a basic filtration step. This prevents leaves, twigs, and debris from ending up in your reservoir.
Filtering suggestions:
- Fine nylon mesh at the pipe opening
- Metal strainer secured at the bucket’s mouth
- Clip-on filter fitted to the end of the pipe
Getting this step right helps prevent clogs and extends the life of your system.
Connect the Reservoir to the Vertical Garden
Once the water is stored, it’s time to send it to your plants. This can be done using gravity or with a small pump, depending on how high your vertical garden is compared to the reservoir.
Connection options:
- Hose with a valve to control water flow
- Spigot installed at the bottom of the reservoir
- Simple drip system made with small perforations in the hose
If your vertical garden is positioned higher up, consider elevating the reservoir with a stand—or using a low-pressure pump.
Test Your System
Before calling it done, run a full test during light rain—or simulate one by pouring a bucket of water into the system.
During the test, check for:
- Leaks at pipe connections
- Proper water flow throughout the system
- Filter performance and drainage
- Whether plants are receiving balanced watering
Make any necessary adjustments and be sure to check the system regularly—especially after long dry spells or heavy rainfall.
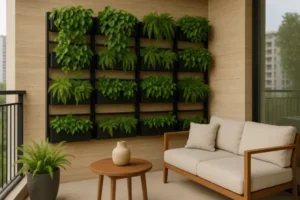
How to Distribute Water in a Vertical Garden
Once you understand how to channel rainwater for vertical gardens in gourmet balconies, the next step is figuring out the best way to deliver that water to your plants. This part is essential to ensure your entire garden gets watered evenly—without overwatering or leaving some spots dry.
Even though it’s a simple process, choosing the right method makes all the difference. In gourmet balconies, where space is compact and thoughtfully arranged, the distribution system needs to work smoothly and efficiently.
Here are two great ways to water vertical gardens effectively:
Drip System
This method delivers water directly to the base of each planter. It helps keep the soil consistently moist without soaking it—perfect for small pots or plants that prefer low water intake. Just poke small holes in a hose and place it close to the roots of each plant.
Perforated Hose
Better suited for larger setups with multiple plant rows, a perforated hose provides a steady water flow along the entire length. Install it at the top of your green wall, and let gravity do the rest—it waters each row as it flows downward.
In both cases, you can control the water flow with a basic spigot or even add a timer to automate the process. That way, your plants get what they need—even on busy days.
The key lies in the small adjustments. Always check whether all your plants are receiving enough water. If some areas look drier or wetter than others, reposition the holes or fine-tune the flow accordingly.
Also, pay attention to irrigation timing. Using rainwater wisely keeps your garden healthier and prevents waste. A well-adjusted system waters gently, avoids puddles, and makes caring for your plants easier and more enjoyable.
Caring for Stored Rainwater
Not all rainwater is ready to use on your plants right after collection. Even if it looks clean, it may carry small debris, dust, leaves, or even air pollutants. That’s why it’s important to take a few precautions before using it in your vertical garden.
Ideally, rainwater should be stored properly—with attention to cleanliness and how long it stays unused. Water that sits for too long can lose quality and may no longer be safe for your plants.
Here are a few simple practices to help keep your water in good condition:
Always Store in a Covered Container
This keeps leaves, twigs, and other debris from falling directly into the water.
Use a Filter or Strainer at the Entry Point
A fine mesh screen at the reservoir opening helps block larger particles and keeps the water cleaner.
Avoid Letting Water Sit Too Long
If your container stays full for many days, the water can start to smell or develop algae.
Use the Water the Same Day You Collect It, When Possible
Fresh rainwater has more oxygen and is better absorbed by the plants.
If you need to store water longer, keep the container tightly closed, out of direct sunlight, and in a well-ventilated spot. Check regularly for changes in color, smell, or clarity.
If you notice anything unusual, safely discard the water and clean the container before using it again.
With these simple precautions, rainwater remains a safe and practical ally in caring for your vertical garden—making your watering routine both eco-friendly and effective.
Benefits for Your Vertical Garden
As you learn how to channel rainwater for vertical gardens in gourmet balconies, you’ll start noticing advantages that go far beyond basic irrigation.
Some of the key benefits include:
- Healthier plants thanks to balanced watering
- Less reliance on tap water
- A more self-sufficient and low-maintenance garden
- A natural connection to the rhythm of the rain
- Greater ease and convenience in your daily balcony routine
All of this leads to a more relaxed lifestyle—with fewer worries and more time to enjoy the beautiful space you’ve created.
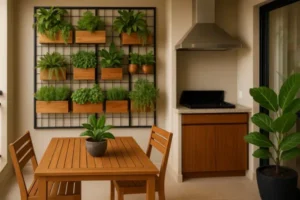
How to Adapt the System for Apartment Living
Many people living in apartments assume it’s not possible to use rainwater effectively. But with a few creative adjustments, you can definitely make it work—even in limited spaces.
Creative solutions include:
- Mounting a small gutter along a side wall of your balcony
- Placing funnels where water naturally drips or flows
- Installing a compact reservoir beneath your vertical garden
- Using discreet internal hoses to adapt your irrigation system
Even with space constraints, you can still collect small amounts of water that make a real difference in your plant care routine.
Simple Automation for Rainwater Irrigation
You can make your setup even more convenient with a few basic automation tools. There are easy-to-use devices that help control the flow and timing of your watering schedule.
Practical ideas that work:
- Battery-operated timers
- Gravity-activated valves
- Moisture sensors that trigger the system
- Low-pressure pumps powered by small solar panels
All of these tools help keep your garden watered—even during dry days—without the need for constant monitoring.
Conclusion
Channeling rainwater into your vertical garden is easier than it seems. With just a few small adjustments, you can build a functional, cost-effective, and low-maintenance system that fits right into your gourmet balcony routine.
By applying what you’ve learned about how to channel rainwater for vertical gardens in gourmet balconies, you’ll create a more balanced environment—with healthy plants and a watering routine that feels effortless and natural.
With a little planning and creativity, even the smallest spaces can benefit from the rain. Keep following our posts for more ideas to make your gourmet balcony greener, more vibrant, and full of life.